History
home | history | then and now
Then And Now
Photography was restricted during the operational life of Pyestock so I wasn’t expecting many
archival photographs to surface. However, a photographic record of the site construction, day-to-day operations
and testing gas turbines was kept. Choice photographs from this collection were included in various guides and brochures.
One such document was the Procurement Executive Brochure, published in 1981.
This extensive booklet covered the whole range of operations at Pyestock and included a number of black
and white photographs of the key areas.
When reviewing the photographs I took between 2006 and 2007, I discovered many of my shots showed the same buildings
and/or test cells. In some cases, the original photographer and I climbed to the same vantage point, as several
of the photographs were taken from exactly the same place.
As I found myself occasionally comparing the photographs, I felt a Then And Now collection of pages would be
interesting. Whilst the heavy plant and test cells themselves remained rigidly static over the years, the control
rooms and various parts of the site were constantly changed and upgraded. Furthermore, it’s fascinating to see
equipment actually being installed and tested in the test cells; making many of my photographs seem rather empty
by comparison.

|
Air House
Eight pictures including interiors, exteriors and the control room.
|

|
Number 9 Exhauster
One picture of the Parsons turbine.
|

|
Number 10 Exhauster
One picture of the Parsons turbine.
|

|
Plant House
Two pictures of equipment in the turbine hall.
|

|
Air Drying Plant
Two pictures of the Ceca and Birlec air drying plant.
|

|
Cell 1 & 2
Eight pictures including exterior views, a turbine being tested and the control room.
|

|
Cell 3
Six pictures of the interior of the cell and the now-demolished air heater.
|

|
Cell 4
Five pictures of the interior of the buildings and the cell itself.
|

|
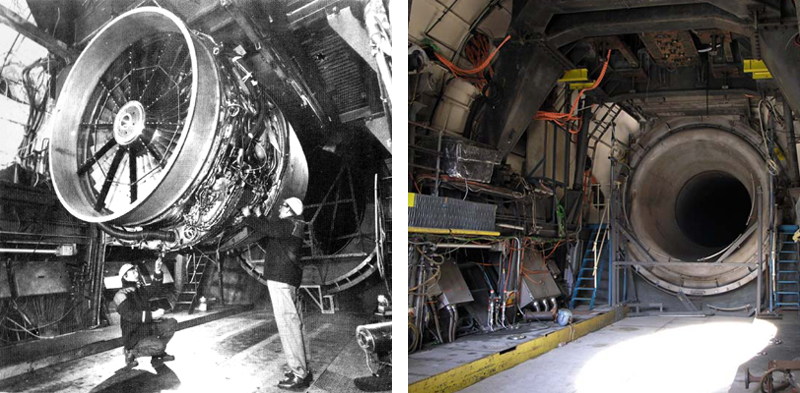
Cell 3 West
Twelve pictures including cell testing and rare shots of the front dome in testing position.
|

|
Computer Building
One vague shot of the wallpaper.
|

|
Power Station
One photograph of the turbine generator.
|

|
Battle Test House
Four photographs including the transportation of the boilers.
|

|
Admiralty Test House
Two photographs of the test house and control room.
|

|
Cooling Towers
Two photographs: the Air House cooling towers and the Bramshot cooling towers.
|

|
General Scenes
General scenes from around the site.
|
Further archival photographs can be found published on
Malcolm Knight's website
(including pictures of the construction of the Air House) and Ian Mckenzie's
book (including the building of Cells 1 & 2).
|